Thorens TD125Mk2 repairs

My stereo and other stuff Thorens TD125Mk2 hinge ass'y. TD 125Mk2 Strobe repair and suspension tuning

Thorens TD125Mk2 torsion spring hinge ass'y.

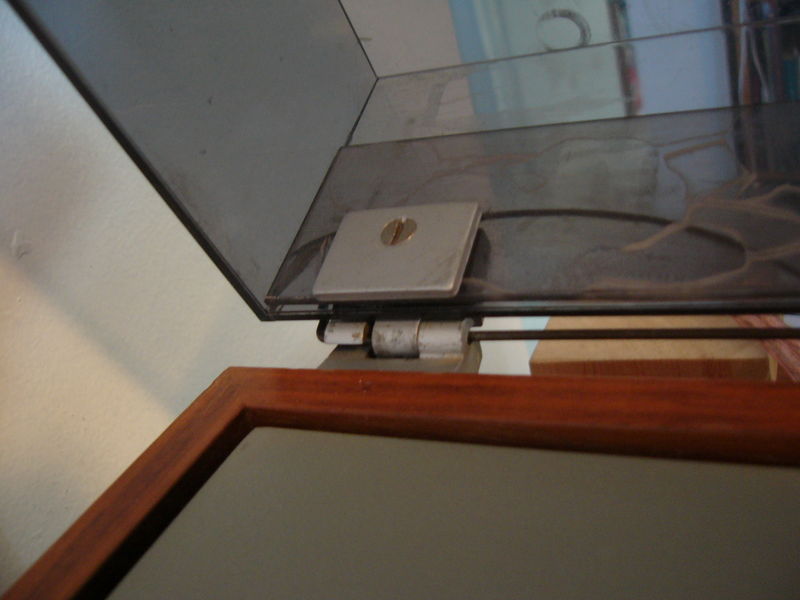
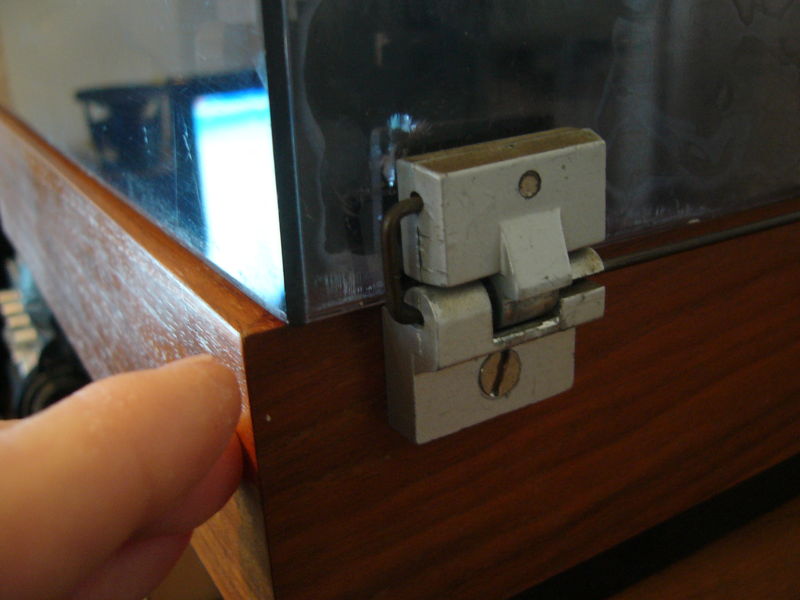
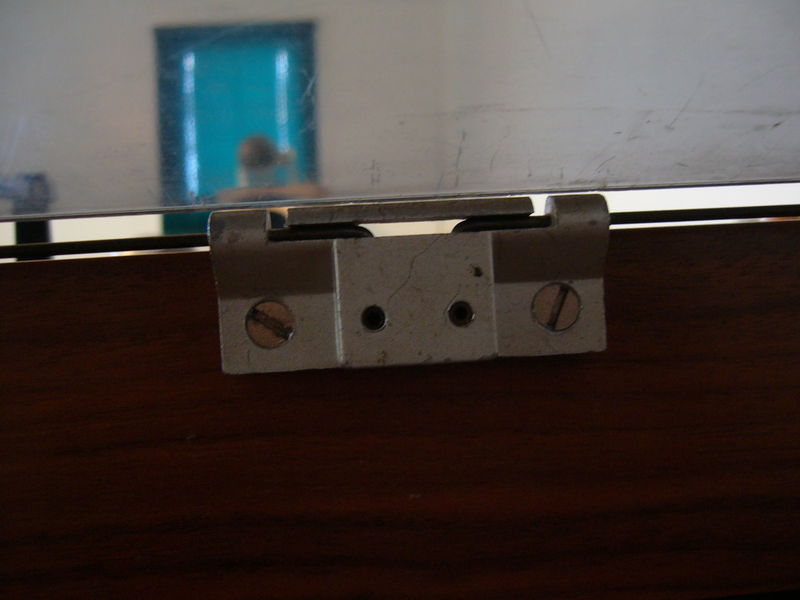
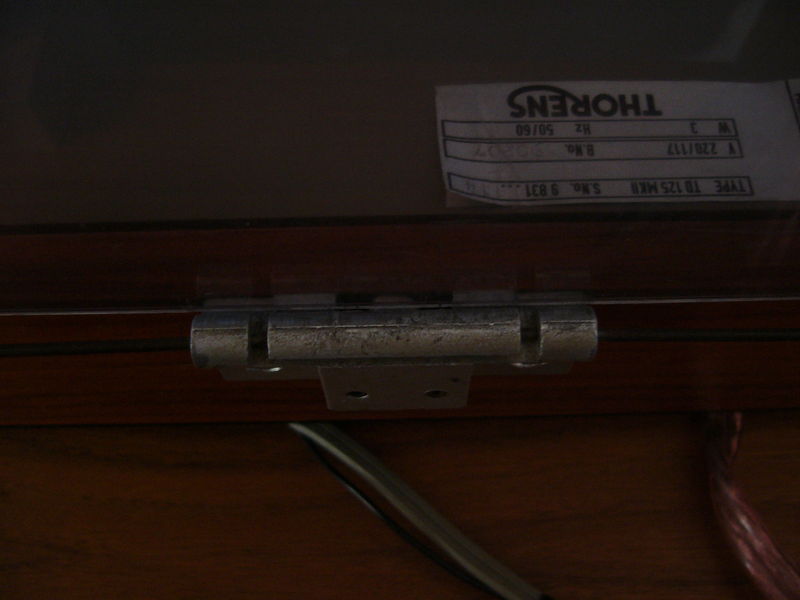
Photos of the Thorens TD125mk2 torsion spring hinge system. What a bitch to reassemble after it unexpectedly flies apart on you, especially since I never paid attention to how it was assembled in the first place!
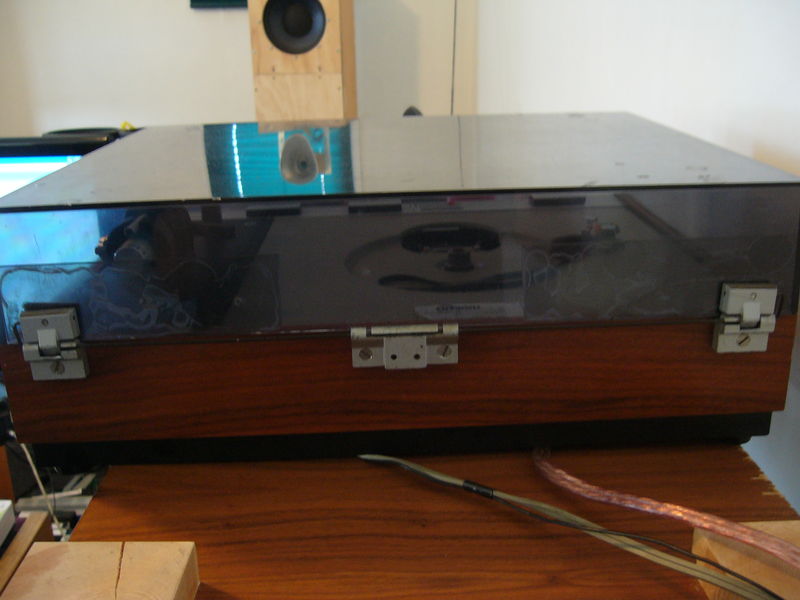
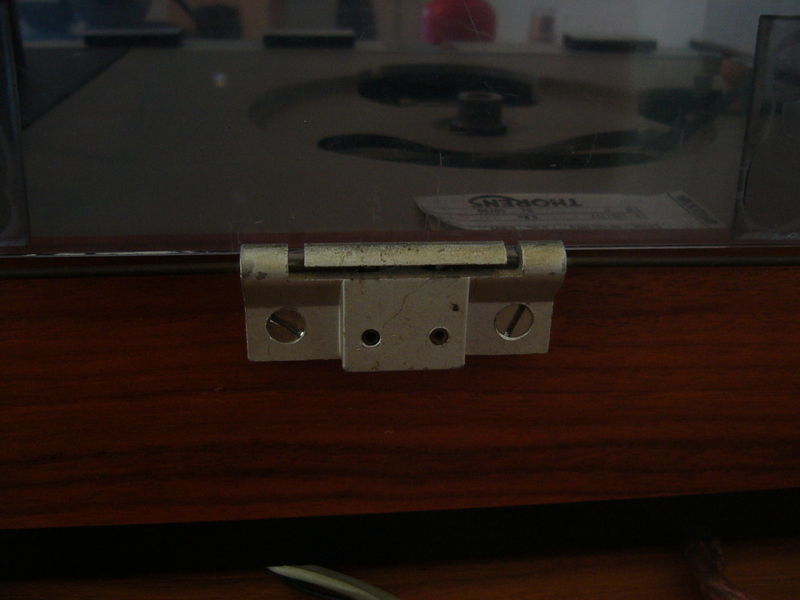
View of the torsion spring hinge ass'y from behind.

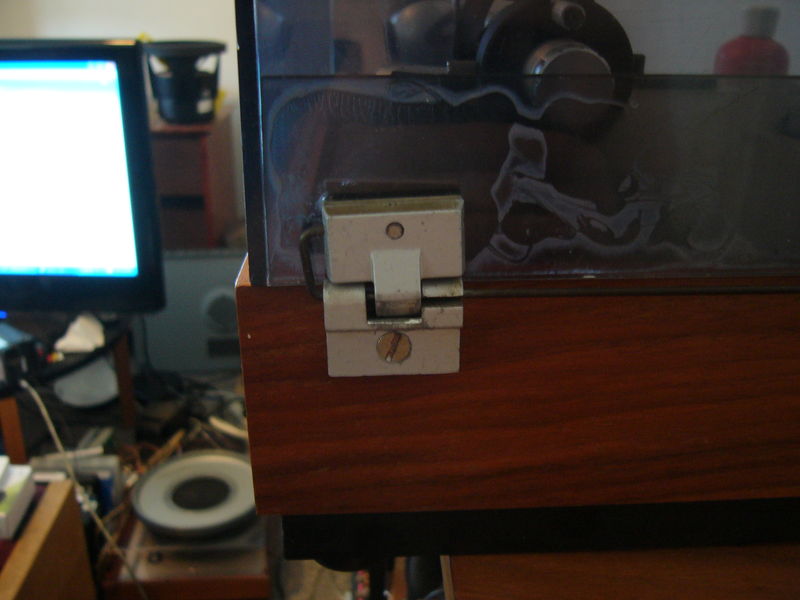
Rear-left hinge ass'y.

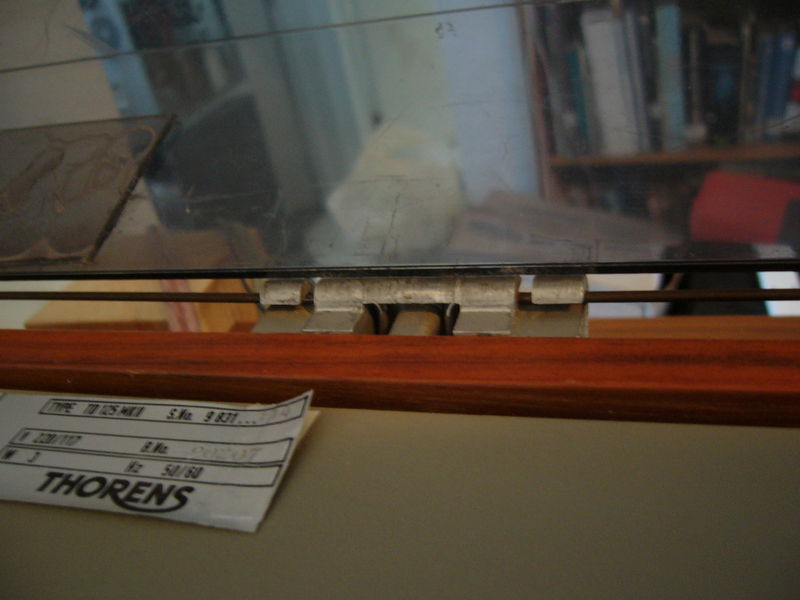
Rear-center hinge ass'y.

Rear-right hinge ass'y.

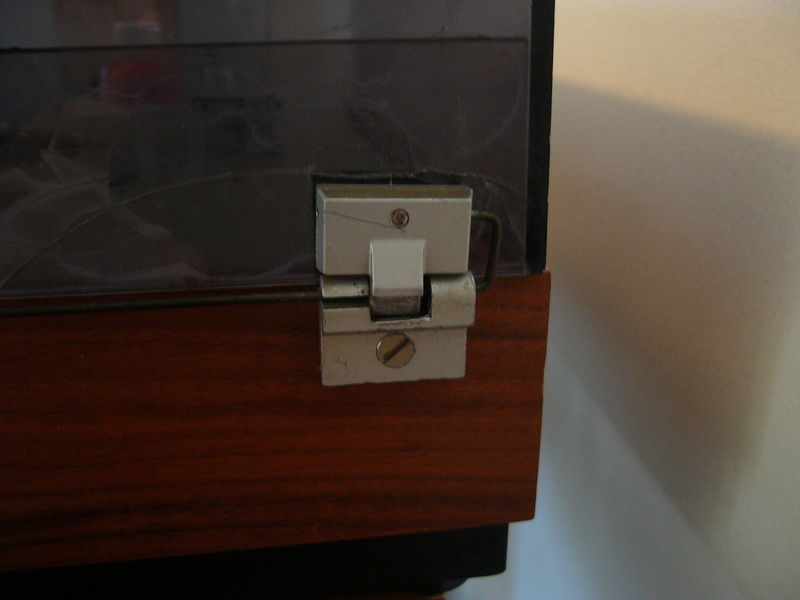
Front right=left rear hinge- NOTICE the slot cut in the hinge is on the oppsite side from the rear left view.... you have to thread the U-hook front-to-back on both outside hinges, with the U-hook "pre-loaded away from the back of the plinth. In order to feed BOTH ends of the torsion spring through their respective slots you need to have the various hinges off the back of the plinth, and then after inserting the springs you screw the hinge on to the back PARTIALLY to not load up the other end of the spring too much to insert the opposite end. I started with the middle hinge and then did one outside hinge then the other. The 2 shell halves that clamp through the plastic dust-cover sandwich the U-hook and sit at approximately an 80 degree angle (from vertical) away from the rear of the plinth. This is repeated on the front left=rear right hinge ass'y. The torsion bars are ASYMETRICAL, and will go in either side, but one direction will hold the cover closed instead of holding it open.

Front-internal view of center hinge ass'y... again notice the front and rear opposite slots that the 90 degree L-shaped ends of the 2 torsion bars are fed through, and are under considerable torsional load. They are situated between the wood at the back of the plinth and UNDERNEATH the center hinge, when viewed from behind. If you look at the middle of the photo you will see the 2 90 degree ends bending down and sandwiched between the plinth and the center hinge ass'y.

Front left=right rear view of hinge ass'y.

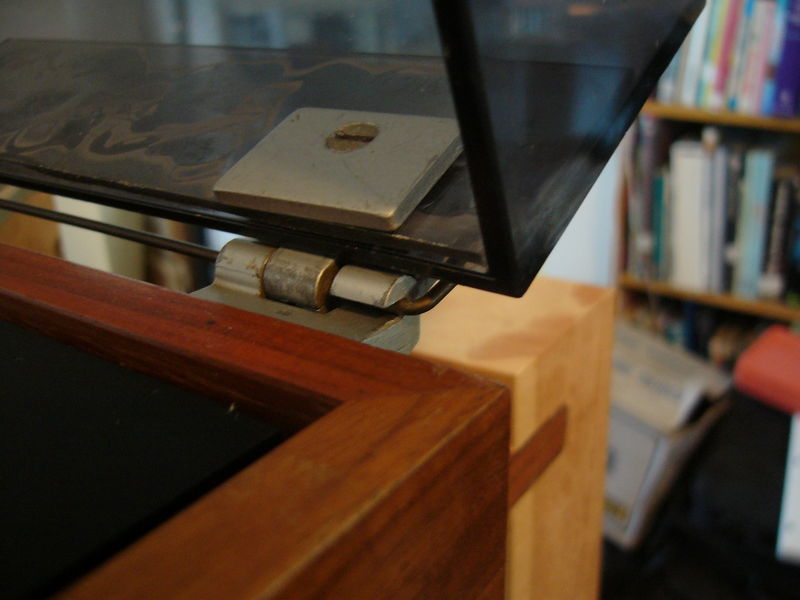
Close-up of the left rear hinge ass'y showing clearly how the U-hook should be sandwiched between the 2 shell halves and then through the dust-cover. Thise is under quite a high amount of torsion, and is a bit of a bitch to pinch the 2 halves together (with your fingers) so they "snap" together. There are alignment ridges cast into the 2 halves. The assembled hinge ass'y sits at approx. 80 degrees from vertical AWAY from the back of the plinth. Pray to your diety of choice that the %#@XX&**% doesn't fly apart as you gingerly put the dust cover up against it and then sandwich the other side with the flat piece of alloy clamp and screw!!!

Close-up rear view of the center hinge ass'y showing the downward bend of the 2 90 degreee L-ends of the 2 torsion bars. The 2 set screws in the middle adjust the torsional strength and open position by a small amount.

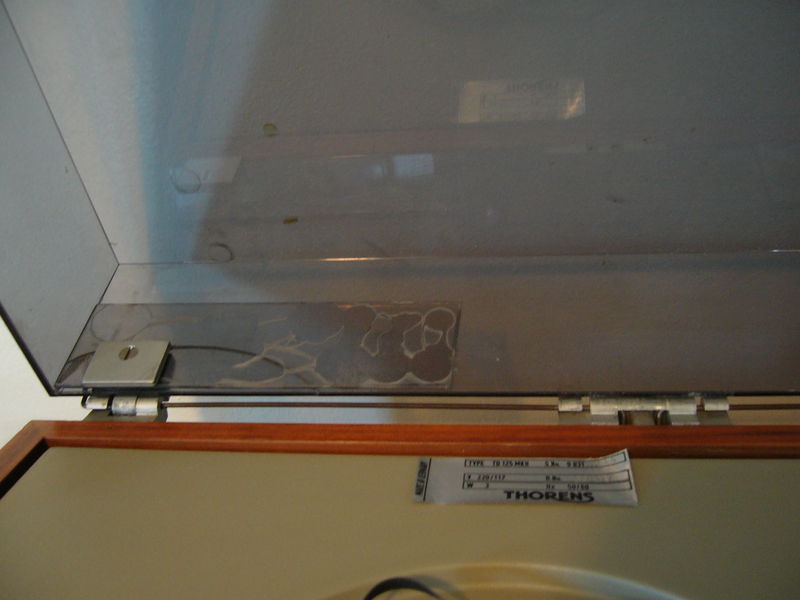
Rear top-view with cover open, showing the top view of the center hinge ass'y.

Internal view of front left=right rear hinge, torsion bar and crazy-glued plastic repair. Clean the plastic with 99.9 % alcohol or methylhydrate and crazy glue it and clamp it immediately and that is NEVER coming apart!